アンチエイリアシング
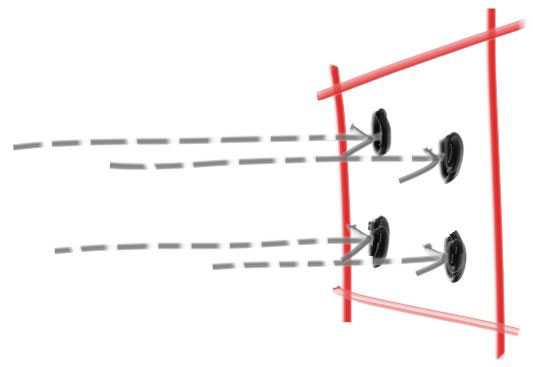
現実のカメラで撮った写真では、物体の周りがギザギザに見えることはない。これは物体の縁のピクセルにおいて前景と背景が混ざるためだ。各ピクセルに複数のサンプルを放って平均値を計算すれば、これと同じ効果を得られる。なお、この本ではランダムサンプリングの層化 (stratification) は実装しない。これは議論を呼ぶ設計だが、私が書くレイトレーサーではいつもこうしている。層化が欠かせないレイトレーサーもあるが、いま私たちが書いている一般的なパストレーサーでは層化で得られるものは少なく、ただコードが汚くなってしまう。また後で機能を足せるようにカメラを抽象化するクラスもここで作成する。
乱数関数
まず実数の乱数を生成する関数が必要になる。一様な乱数を返す関数では \(0 \leq r \lt 1\) の区間の実数を返すのが慣習となっている。\(1\) 未満なのが重要で、この事実を利用する場面もある。
簡単なアプローチは <cstdlib> にある関数 rand() を使うものだ。この関数は \(0\) から RAND_MAX の間の整数をランダムに返すから、\(0\) から \(1\) の間の実数乱数は次のコードで得られる。これは rtweekend.h に足しておく:
#include <cstdlib>
...

inline double random_double() {
  // [0,1) の実数乱数を返す
  return rand() / (RAND_MAX + 1.0);
}

inline double random_double(double min, double max) {
  // [min,max) の実数乱数を返す
  return min + (max-min)*random_double();
}
rtweekend.h] random_double() 関数
長い間 C++ は標準の乱数生成器を持っていなかったが、新しいバージョンで <random> ヘッダーがこれを解決した (ただ専門家に言わせるとこれでも不十分らしい)。C++ の乱数生成関数を使う場合には次のようにする:
#include <random>

inline double random_double() {
  static std::uniform_real_distribution<double> distribution(0.0, 1.0);
  static std::mt19937 generator;
  return generator(distribution);
}
rtweekend.h] <random> を使った random_double() の実装
複数のサンプルを使ったピクセルの描画
各ピクセルに対して複数のサンプルを生成し、各サンプルを通るレイを射出し、各レイの色の平均を求めよう:

それから仮想的なカメラの管理とシーンのサンプリングに関連する処理を行う camera クラスも作る。次のクラスにはこれまでと同じ軸に固定されたカメラが実装されている:
#ifndef CAMERA_H
#define CAMERA_H

#include "rtweekend.h"

class camera {
public:
  camera() {
    auto aspect_ratio = 16.0 / 9.0;
    auto viewport_height = 2.0;
    auto viewport_width = aspect_ratio * viewport_height;
    auto focal_length = 1.0;

    origin = point3(0, 0, 0);
    horizontal = vec3(viewport_width, 0.0, 0.0);
    vertical = vec3(0.0, viewport_height, 0.0);
    lower_left_corner =
      origin - horizontal/2 - vertical/2 - vec3(0, 0, focal_length);
  }

  ray get_ray(double u, double v) const {
    return ray(origin, lower_left_corner + u*horizontal + v*vertical - origin);
  }

private:
  point3 origin;
  point3 lower_left_corner;
  vec3 horizontal;
  vec3 vertical;
};
#endif
camera.h] camera クラス
続いて複数のサンプルを使った色の計算を行うよう write_color() 関数を更新する。色をサンプル数で割ってから足すのではなくて、色を足してから最後にサンプル数で割って計算を減らすようにする。また x を [min,max] の範囲で切り捨てる関数 clamp(x, min, max) が必要になるので、ユーティリティ関数として rtweekend.h に追加する。
inline double clamp(double x, double min, double max) {
  if (x < min) return min;
  if (x > max) return max;
  return x;
}
rtweekend.h] clamp() 関数
void write_color(std::ostream &out, color pixel_color, int samples_per_pixel) {
  auto r = pixel_color.x();
  auto g = pixel_color.y();
  auto b = pixel_color.z();

  // 色の和をサンプル数で割る
  auto scale = 1.0 / samples_per_pixel;
  r *= scale;
  g *= scale;
  b *= scale;

  // 各成分を [0,255] に変換して出力する
  out << static_cast<int>(256 * clamp(r, 0.0, 0.999)) << ' '
      << static_cast<int>(256 * clamp(g, 0.0, 0.999)) << ' '
      << static_cast<int>(256 * clamp(b, 0.0, 0.999)) << '\n';
}
color.h] マルチサンプルの write_color() 関数
メイン関数も同様に変更する:
int main() {
  const auto aspect_ratio = 16.0 / 9.0;
  const int image_width = 384;
  const int image_height = static_cast<int>(image_width / aspect_ratio);
  const int samples_per_pixel = 100;

  std::cout << "P3\n" << image_width << " " << image_height << "\n255\n";

  hittable_list world;
  world.add(make_shared<sphere>(point3(0,0,-1), 0.5));
  world.add(make_shared<sphere>(point3(0,-100.5,-1), 100));

  camera cam;

  for (int j = image_height-1; j >= 0; --j) {
    std::cerr << "\rScanlines remaining: " << j << ' ' << std::flush;
    for (int i = 0; i < image_width; ++i) {
      color pixel_color(0, 0, 0);
      for (int s = 0; s < samples_per_pixel; ++s) {
        auto u = (i + random_double()) / (image_width-1);
        auto v = (j + random_double()) / (image_height-1);
        ray r = cam.get_ray(u, v);
        pixel_color += ray_color(r, world);
      }
      write_color(std::cout, pixel_color, samples_per_pixel);
    }
  }

  std::cerr << "\nDone.\n";
}
main.cc] マルチサンプルを使ったレンダリング
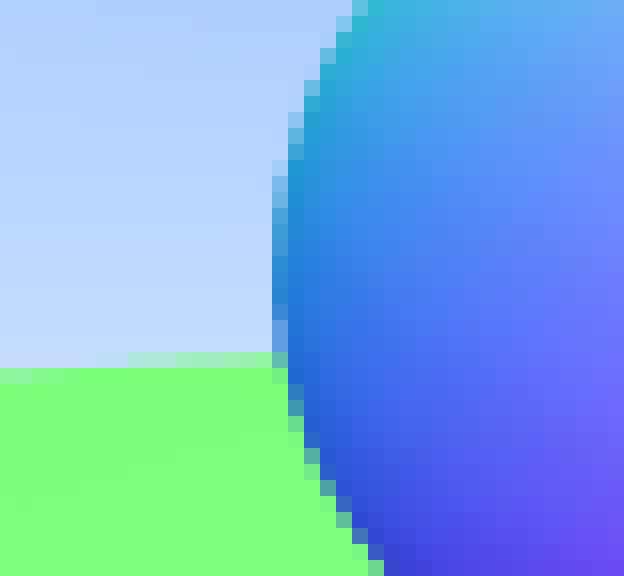
生成される画像を拡大すると、前景と背景にまたがる部分が大きく変化していることが分かる:
